
 English


Views: 0 Author: Site Editor Publish Time: 2026-11-04 Origin: Site


Fastener failure during high-volume installation halts production timelines, damages expensive substrates, and compromises the structural integrity of the final assembly. This reality hits hardest in high-stakes applications like roofing, metal cladding, and structural steel framing. When operators experience self drilling screws breaking, snapping, or burning out, the default assumption is often a defective fastener batch. In reality, failure is almost always a symptom of a mismatch between fastener specifications, tool settings, and material properties.
To eliminate costly rework and material waste, project managers and installers must diagnose the specific mode of failure. A broken screw leaves a compromised connection and an embedded shank that requires time-consuming extraction. This guide breaks down the technical reasons self-drilling screws fail and provides an evaluation framework for specifying the correct fasteners for your application.
Before adjusting procurement or changing installation methods, operators must identify the exact failure mode. Success requires matching the failure symptom to the root mechanical cause. A screw that snaps leaves a different forensic trail than a screw that burns out. Understanding these physical mechanics prevents repeated mistakes on the job site. You can often diagnose the exact issue simply by examining the broken pieces left behind.
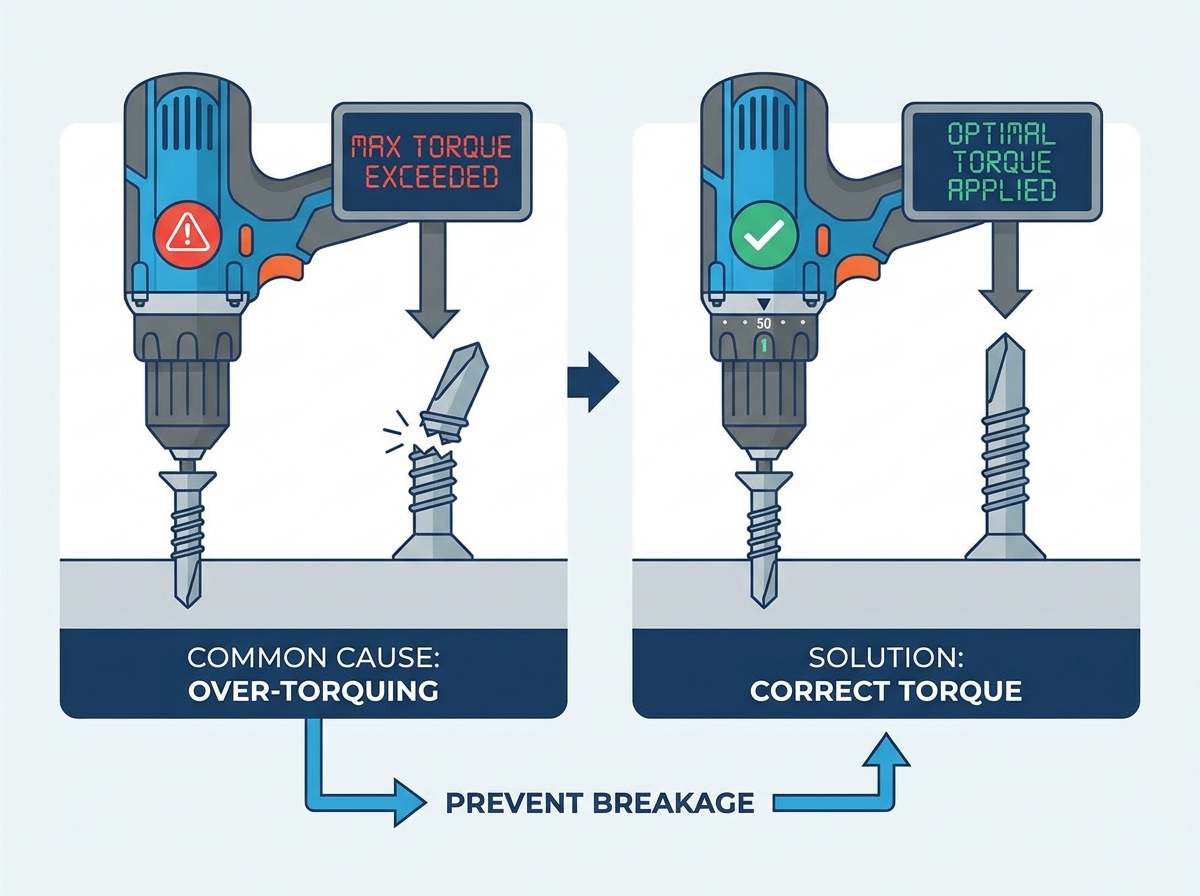
Shear failure occurs when lateral forces or excessive rotational torque exceed the tensile strength of the metal. You will typically see the screw head or the upper shank shear completely off. This snap usually happens just as the screw seats against the material surface. The sudden stop creates a massive torque spike. If the driving tool does not disengage immediately, the rotational force twists the shank until the metal fractures. Off-axis drilling also introduces bending moments, concentrating stress on one side of the fastener and accelerating shear failure. In the field, you will hear a sharp pop, and the head of the fastener will drop to the floor, leaving the threaded shank permanently embedded in the steel.
Thermal degradation is a direct result of excessive friction. When a drill point spins too fast against a hard substrate, it generates intense heat. This heat quickly exceeds the tempering temperature of the screw's carbon steel tip, which is typically around 400 to 500 degrees Fahrenheit. The metal softens, and the sharp cutting edges blunt. Operators will notice the tip turning blue, brown, or black. Once the tip loses its hardness, the self-drilling capability is completely neutralized. The screw will just spin uselessly against the metal, generating even more heat until the tip melts flat. You end up with a smooth, discolored nub instead of a sharp drill point.
Thread stripping happens when the screw successfully penetrates the material but fails to hold its position. This failure is frequent in thin gauge materials like 22-gauge or 24-gauge sheet metal. If the operator applies too much torque after the threads engage, the screw acts like a drill bit and reams out the tapped hole. Incorrect thread pitch also contributes to pull-out. Fine threads in thin metal lack the necessary surface area to grip the substrate. The result is a loose connection that offers zero structural integrity. The fastener spins freely in the hole and can often be pulled out by hand.
Fatigue failure represents a long-term breakdown rather than an immediate installation error. Dynamic loads, thermal expansion, and continuous vibration stress the fastener over time. This is common in heavy machinery cladding, automotive assemblies, and metal buildings exposed to high wind loads. The constant micro-movements cause the screw to back out slowly. Alternatively, the cyclic stress induces metal fatigue, leading to a delayed shank fracture months after installation. Operators often confuse this delayed breakage with a bad installation, but it actually points to an inadequate fastening strategy for high-vibration environments.
| Visual Symptom | Failure Mode | Root Cause | Immediate Field Action |
|---|---|---|---|
| Head sheared off cleanly | Shear Failure | Over-torquing during seating | Switch to a clutch-driven screw gun. |
| Tip is flat, blue, or black | Thermal Degradation | Excessive RPM / Insufficient pressure | Lower drill speed; apply steady body weight. |
| Screw spins freely in hole | Thread Stripping | Over-torquing in thin metal | Lower clutch setting; use coarser threads. |
| Screw snapped mid-shank | Jacking Effect | Flute too short for material thickness | Upgrade to a longer drill point (e.g., #3 to #4). |
Running the driving tool at maximum speed generates catastrophic friction. Inexperienced operators often assume faster drill speeds equal faster installation. The opposite is true for self-drilling fasteners. High RPMs create heat that destroys the heat-treated temper of the carbon steel drill point. Once the temper is lost, the point softens and burns out before piercing the substrate. This is especially common when operators use standard variable-speed drills and simply pull the trigger all the way back.
Regulate the RPM based on the screw size and the substrate material. Thicker steel requires lower RPMs and higher, steady physical pressure. A standard rule is to keep speeds between 1000 and 1800 RPM for heavy structural steel. Thin sheet metal can tolerate higher speeds, sometimes up to 2500 RPM. Always consult the fastener manufacturer's technical data sheet for exact speed ratings. If you see smoke or metal turning blue, you are spinning too fast and pushing too lightly.
The unthreaded portion of the drill point, known as the flute, clears material as the screw drills. This flute must be longer than the total thickness of the material being drilled. If the threads engage the metal before the drill point finishes clearing the hole, the screw binds. The threads pull the screw forward faster than the tip can drill. For example, threads might advance the screw 1/16 of an inch per revolution, while the drill tip only removes 1/64 of an inch of steel per revolution. This difference in feed rate creates massive tension, known as the jacking effect, which snaps the screw instantly.
Specify the correct drill point number based on the total substrate thickness. This calculation must include any air gaps between layered materials. Use a #2 point for thin gauges, a #3 point for medium applications, and #4 or #5 points for thick structural steel. Matching the flute length to the material thickness eliminates the jacking effect entirely.
Fastening wood or dense plastic to a metal substrate introduces conflicting material properties. The screw threads easily bite into the softer wood. As the screw advances, the drill point hits the harder metal and slows down. The threads continue to pull the wood upward while the point struggles to pierce the metal. This separation causes extreme tension across the shank, snapping the screw in half. You will often see the wood lift off the metal frame right before the fastener breaks.
Utilize self-drilling screws equipped with reamer wings. These small metal protrusions sit just above the drill point. The wings bore a larger clearance hole through the wood, preventing the threads from engaging the softer material. When the wings hit the metal substrate, they break off. The threads then engage only after the drill point has successfully pierced the metal, securing the wood tightly against the frame without binding.
Using unregulated impact drivers is a primary cause of fastener failure. Impact drivers deliver violent, kinetic strikes to force the screw inward. When the screw head finally meets the material surface, the required driving force drops to zero, but the impact driver continues to deliver massive torque. The internal anvil strikes thousands of times per minute. This sudden shock load exceeds the fastener's torsional strength limit, shearing the head completely off. Case-hardened fasteners are strong but brittle; they cannot handle kinetic shock loads.
Utilize torque-limiting screwdrivers or dedicated screw guns. Adjust the mechanical clutch settings to disengage precisely when the fastener seats against the material. A properly calibrated clutch stops rotational force the millisecond the screw is tight, protecting the shank from shear stress. Throw the impact drivers back in the truck when working with metal-to-metal self-drilling fasteners.
Attempting to drive standard self-drilling screws into heavy structural steel, hardened alloys, or cast iron will result in immediate failure. The fastener material must be significantly harder than the substrate it is drilling into. Standard carbon steel screws typically sit around 50 to 56 on the Rockwell C hardness scale. If the structural steel approaches or exceeds this hardness, the drill point will flatten, burn out, or snap upon initial contact.
Evaluate the material hardness using Rockwell or Brinell scales before specifying fasteners. If the substrate is exceptionally hard, shift to heavy-duty #5 point fasteners made from specialized high-carbon steel. For extreme hardness, abandon self-drilling screws entirely and pivot to a pre-drilled self-tapping screw strategy. You cannot force a soft screw through hard steel, no matter how much pressure you apply.
Driving the screw at an angle rather than perfectly perpendicular to the substrate compromises the installation. An off-axis angle introduces severe bending moments. The shank is designed to handle rotational and axial loads, not lateral bending stress. As the screw forces its way into the metal at an angle, the uneven pressure snaps the shank. This is highly common when operators work on boom lifts, ladders, or in awkward overhead positions where maintaining a straight drive is physically difficult.
Implement strict operator training on tool alignment. Installers must hold the tool at a perfect 90-degree angle to the work surface. Utilize drill guides or specialized screw guns with depth-sensitive, wide-stance nosepieces. These tools force the operator to maintain a perpendicular alignment during high-volume cladding or roofing projects. If the tool leans, the nosepiece loses contact, alerting the operator to correct their angle.
Poor quality control during electroplating processes, such as zinc plating, introduces hydrogen atoms into the carbon steel matrix. This causes hydrogen embrittlement, making the screw highly brittle and prone to snapping under minimal load. The fastener might look perfect but will shatter like glass when torqued. Alternatively, using 316 or 410 stainless steel self-drilling screws can lead to galling. Galling is a form of micro-welding caused by friction heat. The oxide layers on the stainless threads break down, fusing the screw to the substrate and snapping the shank.
Source fasteners from manufacturers that utilize proper post-plating baking processes. Baking the fasteners at 400 degrees Fahrenheit within one hour of plating bakes out the trapped hydrogen. When working with stainless steel self-drilling screws, drastically reduce the drill RPM. Apply cutting fluid to the drill point to manage heat, and ensure continuous, steady pressure to prevent the threads from seizing.
Selecting the correct fastener requires a systematic audit of the project requirements. Operators cannot rely on generic hardware store inventory for specialized industrial applications. You must evaluate the total material thickness, the environmental exposure, and the substrate hardness to specify a fastener that will perform without breaking. A failure in procurement guarantees a failure on the job site.
The most critical specification is the drill point size. The unthreaded flute must clear the entire thickness of the metal before the threads engage. If you are drilling through multiple layers of steel, you must add the thickness of all layers plus any gaps between them. Use the following technical matrix to guide your procurement strategy.
| Drill Point Size | Max Substrate Thickness (Inches) | Common Applications |
|---|---|---|
| Point #1 | Up to 0.090" | Light HVAC ductwork, thin aluminum frames. |
| Point #2 | Up to 0.100" (approx. 12 gauge) | Standard metal roofing, light steel framing. |
| Point #3 | Up to 0.210" (approx. 1/4 inch) | Heavy metal cladding, medium structural brackets. |
| Point #4 | Up to 0.312" (approx. 5/16 inch) | Thick steel plates, heavy industrial framing. |
| Point #5 | Up to 0.500" (1/2 inch) | Heavy structural steel, I-beams, thick purlins. |
Standard hex-head screws do not fit every scenario. You must specify specialized designs based on the installation environment. Watertight roofing and cladding applications require fasteners with pre-assembled EPDM sealing washers. These washers compress upon installation, creating a waterproof barrier that prevents leaks and galvanic corrosion. For wood-to-metal fastening, reamer wings are non-negotiable. Attempting to bypass these application-specific features leads to structural failure, severe weather damage, and snapped fasteners during the build phase.
Material selection dictates both drilling performance and lifespan. Carbon steel offers superior drilling capability and surface hardness. It easily pierces thick metal but requires heavy exterior coatings, like zinc or ceramic, to resist rust. Stainless steel offers innate, long-lasting corrosion resistance. However, stainless steel sacrifices drilling speed and hardness. It is highly susceptible to galling and cannot drill through thick, hardened steel without burning out. Choose carbon steel for heavy structural penetration and stainless steel for highly corrosive, light-gauge environments.
| Material Type | Drilling Performance | Corrosion Resistance | Best Use Case |
|---|---|---|---|
| Carbon Steel (Zinc Plated) | Excellent (High Hardness) | Low to Moderate | Interior structural framing, thick I-beams. |
| Carbon Steel (Ceramic Coated) | Excellent (High Hardness) | High | Exterior roofing, heavy metal cladding. |
| 410 Stainless Steel | Moderate (Can be heat treated) | High | Corrosive environments, medium gauge metal. |
| 316 Stainless Steel | Poor (Soft, prone to galling) | Maximum (Marine grade) | Coastal applications, thin aluminum substrates. |
Buying unverified, cheap local batches introduces massive liability. Poor quality control leads to inconsistent heat treatment, resulting in soft drill points or brittle shanks. Emphasize procurement from manufacturers that meet strict ASTM or ISO standards. Certified fasteners undergo rigorous testing for shear strength, tensile strength, and torsional limits. Specifying certified hardware mitigates liability in structural applications and ensures consistent performance across thousands of installations. You want a fastener batch that behaves exactly the same on screw number one as it does on screw number ten thousand.
Even with perfect fastener selection, poor execution on the job site will cause breakages. High-volume fastening introduces human and mechanical variables that must be managed. Operator fatigue leads to poor technique, such as off-axis drilling or applying insufficient pressure. Tool degradation, like worn-out driver bits, causes cam-out and strips the screw heads. Inconsistent substrate batches can also introduce unexpected hard spots in the metal.
Impact drivers are generally discouraged for self-drilling screws in metal-to-metal applications. The violent impacts destroy the drill point's cutting edge and over-torque the head during seating. Instead, deploy dedicated, high-torque, low-RPM screw guns. These tools feature adjustable mechanical clutches and depth-sensitive nosepieces. They allow the operator to apply smooth, continuous pressure and automatically stop rotation the moment the screw is properly seated. A screw gun gives you absolute control over the installation process, whereas an impact driver relies entirely on operator reflexes to stop in time.
Never begin a full-scale deployment without testing the setup. Require operators to run a pilot test on scrap project material. This allows the team to dial in the exact clutch settings and find the optimal RPM for the specific substrate. It also verifies that the chosen drill point length adequately clears the material without triggering the jacking effect. This ten-minute test prevents thousands of dollars in wasted materials and labor.
Self drilling screws breaking is rarely a random occurrence. It is a predictable mechanical failure caused by incorrect RPM, mismatched point sizes, improper tool selection, or poor metallurgical quality. By understanding the physics of shear failure and thermal degradation, operators can immediately identify the root cause of the problem and adjust their approach.
When evaluating replacement fasteners, audit your total material thickness and assess the substrate hardness. Select a fastener with the appropriate drill point length to prevent the jacking effect. Ensure you include application-specific features like reamer wings for wood or EPDM sealing washers for exterior cladding.
A: Burnout occurs when the drill operates at an excessively high RPM without enough physical pressure. The high speed generates intense friction, which creates heat that exceeds the tempering limit of the carbon steel. The tip softens, blunts, and turns blue or black, losing its ability to cut through the metal.
A: It is highly discouraged for metal-to-metal applications. Impact drivers deliver violent kinetic force and lack a mechanical clutch. This causes massive torque spikes when the screw head seats against the metal, frequently leading to shear failure and snapped screw heads.
A: Self-tapping screws feature sharp threads designed to cut their own path, but they require a pre-drilled pilot hole to start. Self-drilling screws feature a built-in drill bit tip (the flute) that bores its own hole and taps the threads in a single operation.
A: They fail due to the jacking effect. The threads grip the soft wood while the tip struggles to drill the hard metal beneath. This pulls the wood upward, creating extreme tension that snaps the screw. Always use screws with reamer wings to clear the wood first.
A: If the shank is exposed above the material, clamp locking pliers tightly onto the metal and manually unthread it. If the screw snaps flush with the surface, you must use a specialized screw extractor or drill out the center of the broken shank with a hardened cobalt bit.
A: The general rule is that thicker metal requires lower RPMs and higher physical pressure, typically between 1000 and 1800 RPM. Thinner sheet metal allows for higher speeds, up to 2500 RPM. Always verify the exact speed rating with the fastener manufacturer.
A: This happens due to a sudden torque spike. When the head seats, forward movement stops instantly, but the tool continues applying rotational force. Without a properly set mechanical clutch to disengage the drive, the rotational stress shears the head off the shank.